

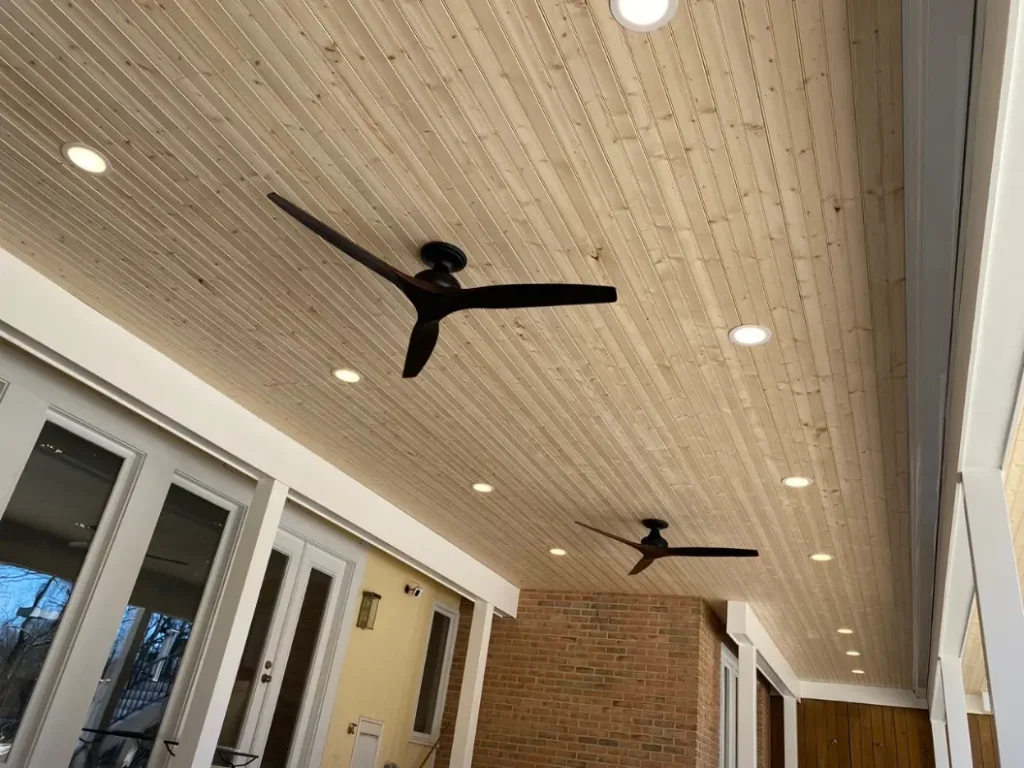
An under-deck drainage system catches the rain that falls between your deck boards and carries it to a gutter, so the space below an elevated deck can stay dry enough for a ceiling, lighting, and a patio. There are two main types. Above-joist systems are installed across the top of the framing before the decking goes down. Below-joist systems attach to the underside of the framing and can often be added to an existing deck.
Both types can give you a dry space below. The difference is where the water gets caught. An above-joist system stops it before it reaches the joists and beams. A below-joist system catches it after it has already run over them, and a ceiling then hides that framing from view. For the long-term life of the deck, that difference matters more than the ceiling finish you choose.
Key Takeaways
• Above-joist systems catch water before it reaches the framing, but they have to go in while the decking is off.
• Below-joist systems can often be added under existing decking, but rain still runs over the joists and beams first.
• A ceiling with no drainage behind it does not keep the space dry and can hold moisture against the framing.
• Headroom, access to the framing, electrical work, and where the water discharges are all easier to plan before the ceiling goes up.
Why Does the Space Under a Deck Need a Drainage System?
The space under a deck needs a drainage system because a deck is built to let water through. The gaps between deck boards let rain drain off the surface, give the boards room to expand and contract, and allow air to move through the structure. Composite and PVC manufacturers set specific board spacing requirements for their products, and following them matters for performance and for the manufacturer’s warranty.
Tightening the gaps is not a solution. Boards installed without the required spacing hold water on the surface and can put the product warranty at risk, and the water still finds its way through. The practical choice is to accept that the space below gets wet, or to add a system that intercepts the water between the decking and the ground and sends it somewhere else.
How Do You Cover Under a Deck? Your Three Options
To cover under a deck and keep the space dry, you need something that catches the water and something that finishes the underside. There are three common setups, and only two of them keep the space below dry.
Above-joist drainage with a separate ceiling. A system such as Trex RainEscape® is installed over the joists before the decking, and a ceiling of your choice is installed under the joists afterward.
Below-joist drainage, sometimes combined with the ceiling. A membrane, trays, or panels attach under the framing and slope to a gutter. Some products, such as Zip-UP UnderDeck®, use the ceiling panels themselves as the drainage surface.
A ceiling with no drainage behind it. Fastening soffit or beadboard to the bottom of the joists without a drainage system does not keep the space dry. Rain still comes through the board gaps and lands on the back of the ceiling, and the framing above it has less air around it to dry. That is the kind of detail that keeps wood wet for long periods, which is what we try to design out of a deck.
If the goal is only to hide the area under a low deck, that is a different project. Skirting or lattice around the perimeter closes off the view, but it can also limit airflow, so the decking manufacturer’s ventilation and clearance requirements still need to be met.
Above-Joist vs. Below-Joist Drainage: What Are the Trade-Offs?
The main trade-off is framing protection against convenience. Above-joist systems catch water before it reaches the joists and beams but require the decking to be off during installation. Below-joist systems can usually be installed under existing decking but leave the framing exposed to the water coming through the boards.
| Above-joist systems | Below-joist systems | |
| Where it is installed | Across the tops of the joists, under the decking | Under the joists |
| When it can go in | New construction, or when existing decking is removed | New construction, or under existing decking for many systems |
| Where the water is caught | Above the joists, before it reaches the framing | Below the joists, after it has run over the framing |
| Ceiling | Installed separately below the joists | Separate, or built into the system on some products |
| Access to the framing later | Depends on the ceiling installed below | Depends on the system; some panel systems open in sections |
Above-joist systems
An above-joist (or over-joist) system goes across the tops of the joists before any decking is installed. Trex RainEscape® is an example. According to Trex’s installation guide, the troughs are draped over the joists and sloped toward the outer edge of the deck, with 1/8 inch per foot listed as typical. On a ledger-attached deck, the trough end slips under the wall flashing at the ledger. Funnel-shaped downspouts sit between the joists near the rim joist and empty into a gutter below them. The guide covers both 16-inch and 12-inch joist spacing, so a deck framed with closer joist spacing can still use the system.
The benefit is that the water is stopped before it reaches the joists and beams, and the open joist bays underneath are ready for a ceiling. The limitation is timing. Because the system sits under the deck boards, it can only be installed during new construction or when the existing decking has been removed.
Trex’s guide describes the detail at a ledger. It does not describe how the system ends at the house on a freestanding deck, and TrueDecks® generally recommends freestanding construction or robust through-bolted connections when practical. If your deck is or will be freestanding, ask how the system will be detailed along the house side.
Below-joist systems
A below-joist (or under-joist) system attaches to the underside of the framing. Panels, trays, or a membrane slope toward a gutter, and many can be added to an existing deck without taking up the decking. For a deck that is not otherwise being rebuilt or resurfaced, that is a practical advantage.
The trade-off is that rain still runs through the board gaps and over the joists and beams before the system catches it. Once a ceiling closes off the bottom of the framing, those members have less airflow around them to dry out. When we open older decks for repairs, the deterioration we find usually comes from construction details that keep wood wet and slow its drying, not from the occasional rain. A closed-in joist bay can become one of those details.
That makes framing protection and inspection more important with this type of system. On new construction, TrueDecks® applies a specialized protective sealant to the wood framing and uses joist protection tape. On an existing deck where the decking stays in place, the tops of the joists cannot be reached, which is one more reason to have the framing evaluated before it is covered.
Zip-UP UnderDeck® is an example of a below-joist product that combines drainage and the finished ceiling. Its panels zip into PVC rails pitched toward a gutter, and, like most below-joist systems, it can generally be installed without removing the existing decking. Zip-UP’s installation guide also describes unzipping individual panels to reach wiring or plumbing, which makes it easier to look at the framing later. It does not keep water off the joists above it.
Manufacturers of both types make competing claims about their systems. Ask the contractor to explain the manufacturer’s installation and warranty requirements and how the system will interact with the framing and decking above it.
Which Option Fits Your Deck?
The right option usually depends on whether you are building a new deck, resurfacing an existing one, or keeping the existing decking.
You are building a new deck. This is the easiest time to plan usable space below. The drainage system, beam layout, headroom, gutter location, and electrical rough-in can all be designed together, and an above-joist system can go on before the decking.
You are resurfacing an existing deck. When the old decking comes off, the tops of the joists are exposed, which is the condition an above-joist system needs. Before TrueDecks® resurfaces a deck, we evaluate accessible posts, beams, joists, ledger or house connections, flashing, structural hardware, stairs, and railing attachment areas, and determine whether repairs, reinforcement, or moisture protection should be completed first. That evaluation carries more weight when a ceiling is planned, because anything that needs attention should be handled before it is covered.
You want to keep the existing decking. A below-joist system may be the practical choice. Have the framing evaluated first, correct any moisture damage, and plan how the framing will be inspected once the ceiling is in place. A drainage system and a new ceiling will not correct framing that is already deteriorating.
What Should You Plan For Before the Ceiling Goes Up?
Before the ceiling goes up, plan for headroom, access to the framing, exterior-rated materials, ventilation, electrical work, and where the patio and runoff will go. A ceiling is what turns the underside of a deck into a finished space, and it is also the hardest part to change after installation.
Headroom and beam layout
On many decks, the beams hang below the joists. A ceiling installed at the bottom of the joists then has beams dropping through it, and the lowest point sets how tall the space feels. On a new deck, the beam and post layout can be planned around the space below. On an existing deck, measure the clear height under the beams before deciding what the space can realistically be used for.
Access to the framing
Once a ceiling is installed, the ledger or house connection, beam and post connections, and structural hardware are no longer visible. On older decks, we find deterioration hidden in places the homeowner could not see, including framing concealed behind fascia. Ask how the framing will be inspected in the future and whether access points will be provided at critical connections. A deck safety evaluation can only assess components that are accessible, and a ceiling with removable panels is easier to work around than one fastened in place.
Materials meant for outdoor exposure
Even with a drainage system, the space under a deck is outdoors. Humidity, wind-driven rain, and temperature swings all reach it, so ceiling materials, trim, and fasteners should be products made for exterior use. Common ceiling materials include vinyl or aluminum soffit, which is low-maintenance and practical; PVC beadboard, which resists moisture and has a more finished look; and wood tongue-and-groove, which looks the warmest but needs a protective finish and regular upkeep. Combined drainage and ceiling systems use their own panels as the ceiling.
Ventilation
According to NADRA, the International Residential Code does not specifically regulate ventilation under exterior decks, but decking manufacturers can set their own requirements, and those installation instructions effectively become part of the code. When a drainage system and ceiling are added, both the decking manufacturer’s and the drainage manufacturer’s requirements need to be followed.
Lighting, fans, and outlets
Electrical work should be designed before the ceiling is installed, because running wire and setting boxes is much easier with the framing open. Decide early where you want light fixtures, a ceiling fan, outlets, and switches, and where a television or outdoor kitchen might go.
Fixtures and devices under a deck need to be rated for their exposure. The National Electrical Code distinguishes between damp locations (protected from weather but exposed to moderate moisture) and wet locations (exposed to weather or water), and the right rating depends on how protected each fixture actually is. A licensed electrician should make that call and handle any required electrical permit.
The patio and where the water goes
A paver patio gives the space under a deck a more finished surface than grass or gravel. The detail to watch is where the patio meets the deck posts. On older decks, we have found deterioration at post bases surrounded by soil, mulch, or patio materials that keep water from draining and the wood from drying. The patio should slope away from the posts, and the post bases should not be buried in pavers or concrete, unless PVC or vinyl wraps are installed to protect the wood from moisture.
The water also needs a planned outlet. A drainage system collects the runoff from the entire deck and releases it at a few downspouts, so those downspouts should discharge away from the house foundation and off the patio, with grading that carries the water away.
Do You Need a Permit for Under-Deck Drainage or a Ceiling?
Whether you need a permit depends on the scope of the work and the jurisdiction. New deck construction and complete deck replacements require a building permit in the Maryland and Virginia jurisdictions TrueDecks® serves. For an existing deck, whether adding a drainage system or ceiling requires a building permit varies by jurisdiction, while new electrical work generally requires its own permit and inspection. Enclosing the space below with walls or screens is a larger change that typically does not need a permit. However, if structural changes are needed, it may require a permit, which should be confirmed with the local building department first.
In Maryland, building permits are issued and enforced by the local county or municipality. In Virginia, local building departments enforce permit requirements under the Virginia Uniform Statewide Building Code (USBC). HOA approval, where it applies, is a separate process. TrueDecks® handles required permits and inspections for our construction projects and assists customers with the HOA submittal process.
What Should You Ask Before Hiring Anyone?
Ask what system is being installed, how the framing will be protected and inspected, where the water will go, and what is included and warranted. Two proposals for “under-deck drainage” can describe very different projects, so before comparing prices, ask:
• Is the system installed above or below the joists, and what is the specific product?
• How will the framing be protected from moisture, and will it be evaluated before anything is covered?
• How will the system be detailed at the house, and does that change if the deck is freestanding?
• Where will the gutter and downspouts discharge?
• What ceiling material is included, and how will the beams be handled?
• How will the framing and connections be inspected after the ceiling is installed?
• Are lighting, fans, and outlets included, who performs the electrical work, and who pulls the permit?
• What manufacturer and workmanship warranties apply, and which installation requirements do they depend on?
Choosing an Under-Deck System
An above-joist system on a new or resurfaced deck protects the framing and the space below at the same time. A below-joist system can make the area under an existing deck usable, as long as the framing is sound, protected, and still reachable for inspection after the ceiling goes up. In either case, plan the ceiling, electrical work, and patio together with the drainage instead of one at a time.
Don’t build only for day one. Build for year ten and beyond.
Learn more about our deck building services.
Frequently Asked Questions
How much does an under-deck drainage system cost?
TrueDecks® does not quote a generic per-square-foot figure, because the total depends on more than the drainage product. The size and height of the deck, whether the system goes in during new construction or as a retrofit, whether existing decking has to come off, the ceiling material, the number of beams, gutters and downspouts, electrical work, and any framing repairs found during the evaluation all affect the price. A reliable number comes from an on-site look at the deck and the space below.
Does an under-deck drainage system need maintenance?
Yes, an under-deck drainage system needs routine cleaning to keep working properly. Leaves, pollen, and dirt that fall through the board gaps can collect in the system and its gutters, so the gutters and downspouts should be kept clear to prevent overflow. Sweeping the deck surface also keeps the board gaps open. Maintenance varies by product, so check the specific system’s care instructions.
Can you screen in or enclose the area under a deck?
Often, yes, you can screen in or enclose the area under a deck, but it is a bigger project than adding drainage and a ceiling. Screens or walls change how the space is ventilated, the posts, beams, and ground surface need to suit the enclosure, and the drainage system still has to handle the water from the deck above. An enclosure typically does not need a permit, but structural changes may require one, so confirm with the local building department first. We evaluate the existing structure before recommending how to enclose it. Learn more about our porch construction work, which includes screened spaces.